Big project this weekend, and, what a treat, you get to be part of it!

I'm taking you through a step by step look at my painting process. So here we go!
First comes the inspiration, or in this case a request. My awesome nail lady:
Jen wanted a lil something-something for her nail room. She mentioned Marilyn Monroe, and found me a pic of a pose she liked.
Not too sure where this is.. but yeah. So it was in search of finding an image that was a little bit easier to see. Not to hard as Marilyn Monroe is a pretty commonly searched woman.

So then it's sit down to sketch to see if I can even draw her! Turns out I could. Usually what I will do is print out a picture and draw over in permanent marker the main facial characteristics. Shape of the face, eyebrows, nose, mouth - you get it.
Then it's off to drawing. This didn't take me that long.
I have started to realize how important a pre sketch is. Usually I just sort of go at the painting - which has actually worked out well in the past. This was one where I was glad I did.
Just like when you write down notes, I remember better when I draw. So as I am drawing I am thinking of how this will translate to paint and paintbrush. The proportions, what I need to make sure is highlighted first - blocking off and shading certain areas first. Basically the sketch outlines more then just what I'm going to create - it outlines my plan or strategy.
Then comes the canvas work. Jen wanted a pretty large canvas, so I knew it would be a bit tricky going from a sketch book page to an 80 * 70 cm canvas. Woo big difference! So the I decided to rough it in. It's obviously pretty rough. The picture changes a bit in size as I decide where her hair will go, and shoulders. Placing the eyes, nose, and lips help with the proportions. I can see here that I drew way too chubby of a Marilyn (uh), but when you're sitting looking at a giant canvas, sometimes the details are hard to catch. Or in this case the obvious is hard to catch.
So now I start painting. I started with marking down some "landmarks" like eyes, and lips. Then i started blocking off where shadows and highlights would be.
This is one of the points where I start to think more like a sculptor. I'm doing the highlights for the forehead and moving down the to the nose, suddenly I'm thinking of stretching my finger along a statue - or my own face- seeing how the skin stretches over some places and sinks into others.
Proportions change here as well. Once I put the nose on (ish) suddenly the eyebrows and eyes had to change their position.
Further details are added. Shadowing in the eyes. I remember my art teacher explaining how to draw eyes. They are round, and our lids are over them. Marilyn Monroe has quite heavy eyes, bedroom eyes. As such the creases around her eyeball would be deeper and more shadowed. I also started lightening up some of the shadows and added the bit of eye, cause, well, it was kind of creepy.

I started adding more shading in the nose. I took a lot of time on the nose and kept narrating to myself for some reason. The "trick" to a good nose is a combination of soft and hard lines - is what I would say to myself. Unlike our eyes or lips, which are naturally outlined, the nose isn't - it's all shadow and highlights. so I had to do that. You can see it working in here, as well as adding the eyebrows. Everything is connected to the nose. It's like the belly button, everything comes together there.
The creases in the eyes change with where the nose is, how the skin flows from that, etc. So I tried doing the nose as my first detail. The eyes are always SO tempting - but I was trying to refrain.
You can see the nose has come a lot farther, though in this picture it's a tad fat at the top. My first clear sign that the right eye is too far away - see, it's a good thing I didn't do the eye details!
More shadows and highlights, added color to the lips and lightened up the complexion a bit.
Now it's on to more details.
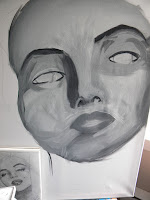
Though i saw the Eye was an issue, I still kept going with it. Here's a case of how hard it is to see the big picture when you're working on the details. I, obviously, outlined the lines and tried to get the heavy top lid right. It is hard to not make her look Asian when her eyes are so "squinty" so it takes a bit of work. I went over the top lid a couple times, as you can see on the right side, to get this right.
Some more shading as I went along as well.

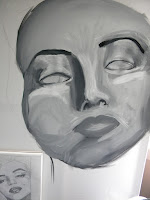
Added more highlights and more shading around the folds of the eyes. I haven't moved the right eye over yet, but I am starting to see it needs to be done. The "circle" of the eye is moving closer to the nose, as well the eye brow starts closer.
Ah the big move of the eye. With a seriously miss-shapen eyebrow!
It takes work to get it back, but it also takes some drying - after a couple layers of paint, it's too sticky for the blending I needed to do.
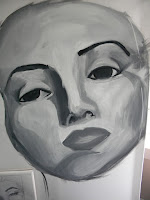
Oh we have eyes! The shape of the eye has gotten a bit better. That eyebrow is still horrible. I am also changing the shape of the face a bit, outlining where I will "skinny" it down.. More highlighting and adding shadows.
She's starting to come together. Though still not a Marilyn Monroe look alike.
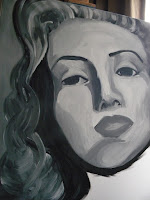

More background and hair.
Lightening the face up some
Somewhere in the process the nose was skinny-ed up a bit. Lips made a bit bigger. Its always good to go back to the basics when drawing a face. I remember my elementary school art teacher telling us how our pupils line up with the corners of our mouths.
Added more background color and working on the hair. It's not easy doing hair, never is. even in my sketch I avoided it.
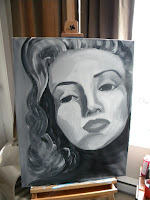
So when I was doing her hair I was trying to think, not in color, but in light and dark. Where did the light catch? Where was the shadow?
I did have to sacrifice some parts as the problem i found was that using grey scale colors her hair looked
old.
I also started her neck and framing her face a bit better.
Now the fun part, I got to add more detail! I was waiting for this!!!
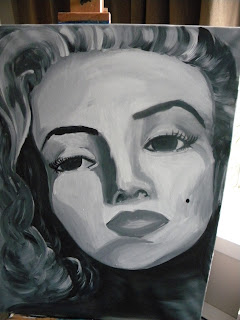
It's always one of the funnest parts doing the feminine details. I fixed the eyebrow - a bit, looking at it now I still could have done a better job.
Another good part about being a girl is that I know how to pluck my eyebrows. That means all those cosmo self help plucking techniques suddenly came in handy! Basically if you place a pencil at the tip of your nostril pointing towards your eyebrow there should be a direct line from your nostril - to pupil - to the middle point in your eyebrow. Also move the pencil to go nostril- inside corner of eye and that will show you where your eyebrow should start. Same system for where it should end: nostril - outside corner of eye = point eyebrow should end.
As you can tell my eyebrows on my Marilyn don't exactly meet my own standards. But again, this is why breaks should be had.
Finally we start adding color to her lips! Marilyn Monroe has some seriously iconic lips, so I took a fair amount of time on them.
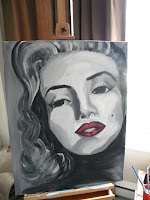
These pictures look pretty similar, but now it was getting down to the nitty gritty. Fixing the nostrils a bit, as well as the shape of her face. I also gave her some lip liner, because, well - she's cool like that. I also revised the shading on her chin and jaw line as I realized it was giving off he right angle I wanted.
Highlights to the lips where added as well as showing for the teeth. I would like to point out that while I flirted with the idea of teeth detail I decided it was just to hard. Seriously, I can't think of one picture with teeth detail that looks really good. If there is, please show me so I can study it! When it comes to teeth I have always figured it is best to imply them but not actually draw them.
Also let's note that they are really grey - not white, same with the iris in the eyes, it's actually a bit darker of a grey. Your eyes and teeth are not pure white, so it's better not to paint them that way.
And then comes the final masterpieces. Signature added after the fact along with the date. I used to never date my pieces but I read up a bit and it was suggested if you want to ever pursue painting as a career, who knows, i may. It gives people who study your work, or art collectors, and idea of what "period" you were... or something like that.
So what do you think?
I know Jen is happy as this will soon be hanging in her nail studio, hopefully gaining praise and lots of new commissions!


